
RV grey water vs black water: know your tanks before you dump
Understand what normally goes into each tank, why both need proper disposal, and how tank layout changes your planning.
 By Rob Knott · · 8 min read
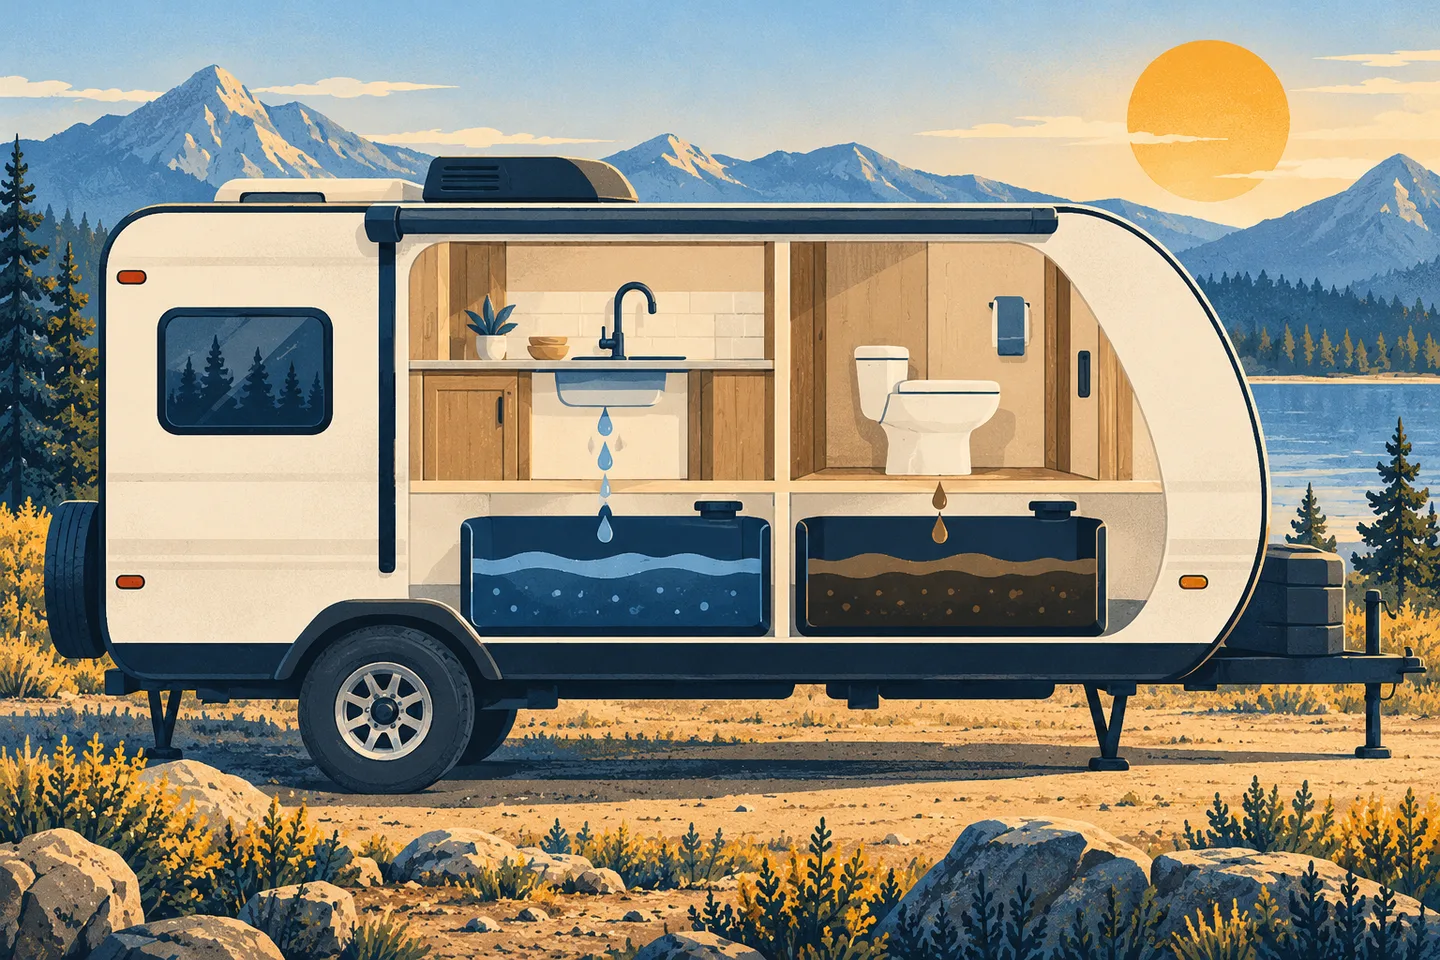
In a typical RV, grey water comes from sinks and showers, while black water comes from the toilet. Fresh water is the clean supply held separately. Both grey and black water are wastewater, and each needs an approved disposal route. Grey water is not drinking water and should not be treated as harmless simply because it did not pass through the toilet.
That is the useful starting distinction. Your next step is to check your vehicle's actual plumbing: some models have more than one grey tank, and some have a combined black-and-grey tank. The names on a general diagram do not establish how every fixture in your particular RV is connected.
Understand the three jobs
| System | Main job | Planning question |
|---|---|---|
| Fresh water | Stores water supplied to fixtures | How much usable supply remains? |
| Grey water | Collects sink and shower wastewater in common layouts | How much wastewater space remains? |
| Black water | Collects toilet waste in common layouts | When and where can it be properly emptied? |
Think of the supply and storage sides separately. A person may drink water from a bottle, wash dishes using the fresh tank and flush the toilet using that same onboard supply. Those activities do not all send the same amount to the same waste tank. Knowing the destination makes both water planning and troubleshooting clearer.
Grey and gray are spelling variants. A “gray tank” label on an American RV generally refers to the same type of system that a guide calls “grey water.” Use the labels and manual supplied with the vehicle when identifying controls; spelling is less important than confirming the correct valve and outlet.
Identify your own layout before operating valves
Start with the model's owner manual or plumbing diagram. Locate the freshwater fill, any city-water connection, tank monitor, waste outlet and labelled valve handles. Identify a black-tank flush connection separately. A hose connection on the side of the RV is not automatically a fresh-water inlet.
Write a small tank inventory: capacity, starting level, drain handle and fixtures served. If there are two grey tanks, list them separately rather than assuming one monitor button describes everything. If your RV has a combined waste tank, use its own operating guidance and plan around the shared capacity.
Airstream explicitly identifies combined arrangements in some smaller trailers. That is a helpful reminder that even a familiar three-tank explanation has exceptions. If the labels are missing or contradictory, ask the manufacturer or a qualified RV technician before experimenting with the controls.
Why the grey tank can fill first
Showers and washing up can produce substantial wastewater in a short stay. The black tank may have plenty of space while the grey tank is nearing its limit. Refilling the fresh tank lets more water into the system, but it does not remove any of the wastewater already stored.
Consider an illustrative day that sends 8 gallons to grey and 2 gallons to black. Over three days, those become 24 and 6 gallons. These are invented arithmetic inputs rather than recommended usage targets. Their purpose is to show why comparing tank sizes alone does not tell you which tank will limit the stay.
Use the RV water budget calculator to test separate flows and capacities, and read our water budget guide for a worked example. Account for external water poured into a sink as well as water drawn from your own tank.
Both waste streams need proper disposal
Use a designated facility and follow the operator's rules. Do not assume a storm drain, roadside grate, campsite or patch of ground is an acceptable substitute. The permissions and disposal rules depend on the location, and a site's “biodegradable soap” claim does not give permission to discharge wastewater.
If the tank is nearly full and the planned station is closed, stop adding unnecessary wastewater and find another approved option. Do not open a valve to relieve the problem onto the ground. If a leak or overflow occurs, stop using the affected system and contact the facility operator or an appropriate service professional for the next steps.
Our Washington dump-station directory distinguishes known access information from unknown access. Read the linked operator source and confirm a non-guest visit when needed. A listing describes evidence about a place; the current signs and staff instructions still govern its use.
Follow the model's emptying procedure
Many RV manuals instruct owners to empty black before grey so the later flow helps rinse the sewer hose. Winnebago's towable manual is one such example. The detailed steps still depend on the vehicle's outlet arrangement and any pump or flush system, so use the manual for your specific RV.
Prepare the appropriate waste-handling equipment, secure the connections and keep fresh-water equipment separate. A printed generic checklist can help you remember preparation and cleanup, but it cannot identify an unlabelled valve for you. Our dump-stop checklist is a planning aid to use with your manual and the station's instructions.
Do not leave a black-tank flush running unattended. Do not assume a drain is clear just because a tank gauge shows an unexpected reading. If draining stops, a valve is stuck or the system behaves differently from its instructions, pause and obtain model-specific assistance instead of forcing a connection or improvising a chemical treatment.
Separate potable water from waste handling
Potable means suitable for drinking. Rinse water at a disposal point has a different purpose. The National Park Service's campground design guidance distinguishes the non-potable water equipment used for holding-tank cleaning; a nearby hose is therefore no proof that the outlet is appropriate for filling a freshwater tank.
Read the outlet's sign and ask the operator when its purpose is unclear. Store waste-handling items separately from drinking-water filling equipment. Follow the equipment manufacturer's cleaning and storage instructions, and wash your hands after dealing with wastewater. The aim is to keep the supply side and disposal side distinct throughout the task.
Use gauges as information, not certainty
Airstream notes that tank-monitor readings can be approximate. A display that changes unexpectedly deserves investigation, but it is not by itself a diagnosis of a blocked tank. Combine the reading with known recent use, the manual's guidance and whether the system is functioning normally.
Use only maintenance products approved for your equipment and follow their labels. A tank treatment is not a replacement for a working disposal system, adequate operating water or correct valve use. Avoid internet recipes that combine chemicals or promise to dissolve any obstruction; plumbing materials and approved procedures vary.
Before the next trip, make three checks: know the layout, estimate the limiting tank and choose a permitted disposal stop. Those habits are more useful than memorising a universal number of days between dumps. Grey and black describe different waste streams, but both belong in a managed system with an appropriate place to empty them.
Sources & further reading
- Airstream: Holding tank layouts and emptying
- Winnebago 2024 Towables Owner's Manual, plumbing section
- Airstream Support: Approximate tank monitoring
- National Park Service campground design guidelines
- Jayco: Find your model's owner manual
Rob creates free, practical resources that make everyday tasks easier. He brings useful information and simple tools together so people can find what they need without unnecessary complexity.
Rob on LinkedIn ↗Put this into practice
Calculate a water budget · Prepare your dump-stop checklist · Explore covered stations
Keep exploring

How to find an RV dump station you can actually use
Check permission, service status, price and water separately before you drive. A practical way to turn a map pin into a reliable stop.

How to plan an RV water budget for your next trip
Estimate fresh water and waste-tank space separately, see which runs out first, and leave room for the uncertainty of a real trip.